Monday, November 8, 2010

Etsy Showcase

As I mentioned in my last post, I have a very talented family.  We can all do something! I really wish we could live closer so we could be creative together.  I must say I am the main problem in this equation due to the fact I moved to New Mexico ( but I feel I am still a Texan at heart!).  Anyways I want to show you some of what my sister can do and my sister in law.  My sister just opened an etsy shop.  She makes these adorable twinkle toe shoes at a great price!

She also makes the most beautiful flowers! You may have seen them in some previous posts with my daughter modeling them.


You should check out the Sassy Goose Boutique and tell her I sent you!

I also wanted to share with you the talents of my sister in law.  She opened her etsy shop last year.  She makes several different items.  I just love her Christmas ornaments.  They look stunning on the tree sparkling in the Christmas lights.

She also makes capes, and boutique children's clothes like this cute pillowcase dress on my niece.

You can find some unique Christmas gifts at Pickled Peppers. 

Saturday, November 6, 2010

Happy Birthday to Me!!!- sewing room reveal

Today is my birthday, and as each year I get older and my life changes, I find I treat it as just as any other day.  What is amazing is how my family still recognizes it and finds it important to celebrate me and my life.  My parents live about 14 hours away and drove to see me for my birthday! That alone is a wonderful present but if you know my parents that is not enough.  My dad made this beautiful bench for me made from my crib I had as a baby.  My dad is a very talented carpenter and if you would like to see more of his projects you can check out his blog.

It has a hinged seat for storage too! I love it and so happy with the heirloom that I will be able to pass down and the stories it will tell. 
My parents were not done with my birthday yet!  I showed them my workroom.

This is the sewing area.

This is my cutting table and ribbon organizer.
This would just not do in their eyes or mine either- it was extra messy when they saw it!  So we hit the ReStore (thrift store for building supplies ).  Dad and Mom put together my room in about a day and a half.  My new table is a door and my shelves are closet doors and my ribbon organizer is made from FOAM BOARD!!


I was given a room that inspires me and makes me want to create.  I love my room and feel the need to go in and look at it to make sure it is real. I have had a wonderful birthday!!!

 I know I am going to get a lot of questions about this ribbon organizer so let me tell you about it real quick.  My dad made these with 5 foam boards.  He cut them to make the shelves and sides and just hot glued them together.  It did take a couple of hours but wow so worth it in my eyes!  He hot glued some washers at the top and screwed a screw in it to hang it on the wall.  And yes, it can hold it all because the ribbon is so light. What can I say but my family is pretty creative. 

Thursday, October 21, 2010

Major League Baseball inspired Neck Rope


So the kids and I were getting ready to go.  I had my daughter all dressed up in her "Olivia" outfit.

My son did not like the fact, that his sister had all this flair and he did not.  He wanted to wear a necklace too but I just could not allow him to wear one of his sister's girly necklace.  What else is a mother to do than make him his own MLB inspired neck rope.  I know these are a little different but the look is the same- in my opinion. 
Quick Steps to Making your own Neck Rope
1.  Cut 3 stripes of jersey knit in the colors you want. ( you can even cut up your own t shirts)
2.  stack the ends and stitch it to keep it still and secure.
3.  put that end in your mouth 8) to hold still and braid
4.  once it is 15 in.  long stitch the other end to secure.
5.  then i made a tube covering.  i just folded over a piece of jersey knit and stitched to make like a one inch tube.  stick the braided rope through the tube. 
6.  Stitch the braided rope together to make a circle and use the tube to cover stitching.

THIS NECKLACE JUST STRETCHES OVER YOUR HEAD.
Sorry I am so sporadic in my posts. Life just gets so busy- I am sure you understand.  On a parting note, I have been making costumes for a local business and here is one set I did. 

I just love this picture and had to share it with you. Have a great day!

Sunday, September 26, 2010

Cowboy and Cowgirl Birthday Party Highlights

Well my babies turned 3 yesterday and I wanted to share some of the pictures.


 I was thrilled when I found out the popular VBS theme this year was cowboy. I was able to find great items on clearance at hobby lobby that were cowboy themed.  My mom found the cute big wall cutouts at oriental trading.  She also had bandana and denim table cloths for me to borrow. I think the party turned out great and my kids had a lot of fun!

Tuesday, September 21, 2010

Cheer OVERLOAD and Zipper Tutorial

I mentioned earlier that I had an order cheerleading costumes- 21 to be exact! I used a simplicity dress pattern and changed it a bit.  After finishing this sample, I was not quite happy with it so I changed patterns and took some useful comment advice for the sizing.  I used New Look pattern 6957

This pattern gave a better finish and I used the size 1 for the 2T size, size 2 for the 3T size and the size 3 for the 4T size.  I added length for the bodice too.

I cranked these out in 8 days but I will tell you I am tired of making them for now.  They will be embroidered with the school emblem of sorts.  Now on with the tutorial.
I have been afraid of zippers for some unknown reason- I guess because it has been so long since I put one in.  I will show you how I did it for those also afraid but this may not be perfect technique but it is what I did.
I had the dress done except for the zipper.  I then basted (longest stitch with no back stitiching) the seam where the zipper would be going leaving plenty of room to iron open and sew on the zipper. The zipper I was using was 12 in. so i basted about 13 in. and regular stitch down the rest of the seam.

Then press open.

Then I pinned the zipper on with right side down and lining up the seam with zipper teeth.

You should probably use more pins than I did.  Then be sure to put on your zipper foot.  This is what mine looks like yours should be somewhat similar.  This helps you stitch close to the zipper teeth.

Then stitch around the zipper.

I  then seam ripped open the seam.

Once this was done, I cut the excess top of zipper and heat sealed it with some flame.

Then I tacked down the top.

After 21 of these I am feeling a bit more confident about zippers.

Sunday, September 12, 2010

Sunday Football Showcase

We took our kids to the NMSU football game last night.  I had to make them something special to wear for the game. I wanted to share how I made my son's shirt.

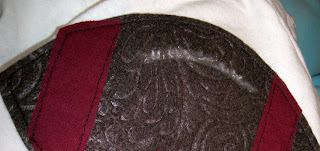
I started with the football.  I used the steam to seam but heat bond would be great too. According to steam to seam you can just iron it and it is permanent so they say you don't have to sew it.  I prefer to just to ensure durability.  I traced the football shape on the paper cut it out and ironed it on some textured brown felt.  I cut it out and peeled the backing off and ironed on the shirt.  Then I did a straight stitch around the football. I cut some crimson fabric stips and put on the football and stitched into place.  For the stitching of the white lacing part of the football- I drew where I wanted it with chalk.

Then I stitched a tight zig zag stitch across the football then did the stripes that go vertically on the top.

For the nubers you need to draw your numbers on the reverse so they are correct when you iron them on.

I ironed the numbers on and just did a straight stitch around the numbers.  Here is the finished project which took about 30 min. 


Saturday, September 11, 2010

Deep Thoughts!!- (well not too deep)

I was outside this morning with the kids thinking about my blog and what I wanted to share next.  As I am thinking this, I was realizing how funny my blog really is.  In a blog, I only share the best of what I am, however that is not who I am.  I make mistakes in crafting, I am not always the best mom or wife, I am constantly not being the godly woman God wants me to be! I am also a horrible friend most of the time.  I am the type of friend who never calls- it is not because I don't care -it's because i don't like talking on the phone. I just thought I should share that with you.  I  don't want anyone to think I am perfect or assume that I think am- if you really know me that would have NEVER crossed your mind (Wink). 

Okay digging my way out of my deep thoughts, I want to share the good things I did as a mom this week. I feel if I document them from time to time it might help me be a better mom as I reflect on our experiences.
1.  Drew a track on the driveway for the kids that included a Mcdonalds, home, crosswalk, stoplight and stop sign.

They loved it and rode for hours yesterday and today.
2.  Had a cooking day.  We made snickerdoodles.  I pulled the coffee table in the kitchen so they could stand at the counter at the same time. They were yummy and the kids loved making them.
3.  My husband and I took them to the NMSU Aggie game and made it to half time. 

I will show you thier outfits tomorrow!!

Now on the down side my kids fought alittle bit- it happens to us all!

Sometimes its best to just walk away and take a moment like my dog did here.